 Photo by Andrew Neel on Unsplash
The context
I’m writing this blog post because I was making my own Time Machine backup setup using a NAS and I realized that I can share my experience with you.
I read a lot of posts on tech forums, how-to tutorials and my NAS constructor official documentation.
It was a lot of information and at the end, I’ve seen three kind of solutions and they all have their pros and cons.
I will show all of those three solutions then what is my final choice and the reason why.
Time Machine backup solutions
Before we get into the main subject, I want to speak a bit about some basic concepts of almost all NAS we can buy on the market.
Overview of NAS storage concept
When working with a NAS, we all do the same through dedicated wizard:
- Fill the NAS with a bunch of disks
- Creation of a RAID storage using all disks or only a subset
- Creation of dedicated volumes for different purposes
- Creation of dedicated shared folders inside volumes
- Manage read/write permissions on volume/folder
Here is a short summary of previous steps in a top-down approach:
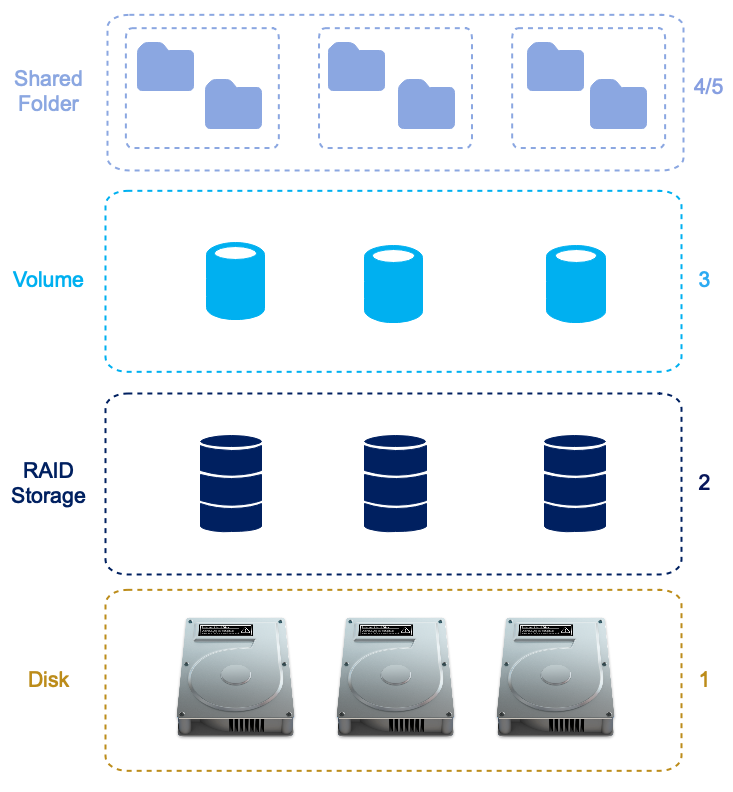
For example, my NAS is filled with three disks configured as a RAID5 pool.
Solution 1
Overview of the NAS storage setup used in this solution:
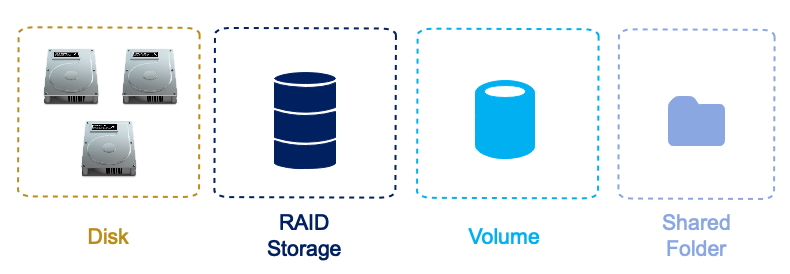 |  |
In this solution, we have:
- A bunch of hard drives configured as a RAID Pool
- One volume dedicated to Time Machine backup
- One shared folder that is used to store all backups
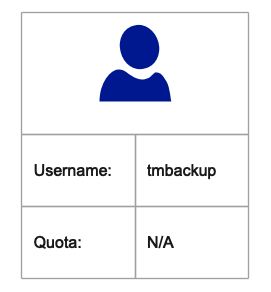
- One dedicated user “tmbackup” that will be used by each machine we want to backup
This is a very easy solution, all we have to do is setup Time Machine on each machine, choose our shared folder on the network, log as “tmbackup”, let Time Machine starts it process and that’s it. However, there are a few drawbacks, macOS is a great operating system but it does not support to be logged with two different NAS users. So if we have one personal account to access our NAS through network and we use “tmbackup” account for our backup, we may face a few issues. Another drawback is the fact that if one computer is making a lot of backups and need a lot of space, our other machines will fail to make their own backup. Remember that there is no notion of “quota” in this solution as there is only one dedicated volume used by one NAS user for all backups.
Let’s summarize benefit and drawback of this solution:
- Pros:
- Easy to setup
- One user (“tmbackup”) for all machine
- Cons:
- We may face an authentication issue if we need to log on another NAS shared folder using our personal account because macOS does not support it very well
- Time Machine sees the entire volume size and its available free space on each machine
- As we have only one shared folder for all machine, there is a risk that one takes more space than another
- Backups are not isolated so there is a risk of backup deletion by someone else by mistake
Solution 2
Overview of the NAS storage setup used in this solution:
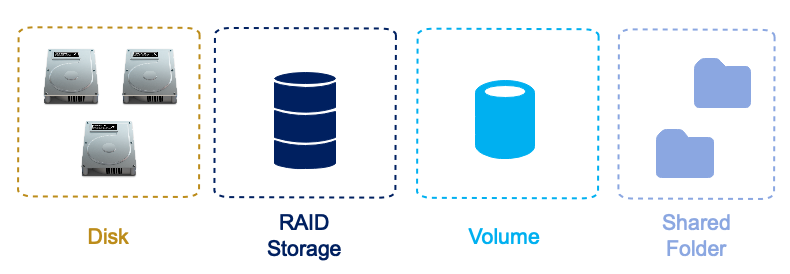 | 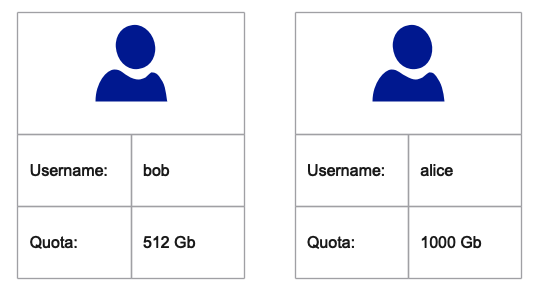 |
In this solution, we have:
- A bunch of hard drives configured as a RAID Pool
- One volume dedicated to Time Machine backup
- A bunch of shared folders, one per machine we want to backup
- Some NAS defined users, in this case two:
- bob
- alice
This is a great solution that is easy to setup and offer a better flexibility than the first one. We still have one dedicated volume for Time Machine backups but now, we have multiple users with quota in order to limit their backups footprints. Each user gets “read/write” permissions to it own shared folder so there is no risk of unwanted backup deletion by another user. On the mac side, we just have to configure Time Machine, choose the right shared folder, log with our NAS user account, let Time Machine starts it process and that’s it. This solution is a viable one and it is the one recommended by most NAS constructors. There are still a few drawbacks but as shared folder are created on a per-machine basis, the only limit we have is the defined user quota. Another drawback is the fact that Time Machine has no view on the defined user quota and sees the whole volume free space as available.
Let’s summarize benefit and drawback of this solution:
- Pros:
- Easy to setup
- Multiple users defined on the NAS
- Backup isolation: no risk of backup deletion by someone else
- Access to the NAS work fine on macOS as we used the same user for backup and network access
- Control of backup size using user defined quota
- Cons:
- Time Machine sees the entire volume size and its available free space on each machine instead of dedicated user quota
- If a user has two machines, one can still takes much backup space than the other
Note: The last point can sometime be resolved if the NAS accept a per shared folder user quota.
Solution 3
Overview of the NAS storage setup used in this solution:
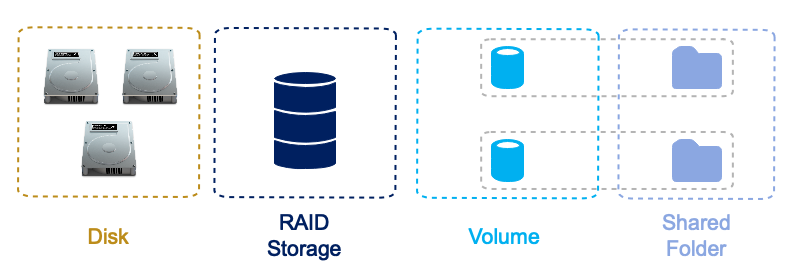 |  |
In this solution, we have:
- A bunch of hard drives configured as a RAID Pool
- One volume per machine we want to backup
- Only one shared folder per volume
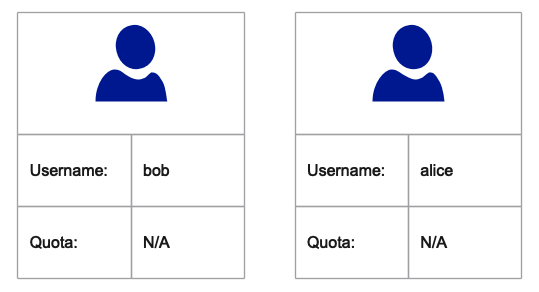
- Some NAS defined users, in this case two:
- bob
- alice
This solution is a bit different than the others because instead of having one dedicated volume, we have one volume per machine we want to backup and we only have one dedicated shared folder per volume. We don’t need to set a user quota because they will use dedicated volume for their Time Machine backup. The dedicated volume and it associated shared folder can be viewed as an external USB hard drive, it feels exactly the same except that we don’t have it connected to our machine. The setup is a bit more complex because we need to create more volume. When we work with volume, we get the ability to resize them if we need to and we can have a fine-grained volume space allocation per machine. Another good point is the fact that Time Machine sees the real available free space provided by the volume and can completely use it. But as with all solutions, there are drawbacks, first, we need to create one volume per machine we want to backup and some NAS constructor tries to limit the number of volume created. Second, we have to create our volume in a future-proof manner because a volume can have some expansion limitations that are fixed at creation time.
Let’s summarize benefit and drawback of this solution:
- Pros:
- Multiple users defined on the NAS
- Backup isolation: no risk of backup deletion by someone else
- Access to the NAS work fine on macOS as we used the same user for backup and network access
- Control of backup size using machine backup defined volume
- Time Machine sees the real volume size and it available free space on each machine
- Cons:
- The setup is a bit more complex
- NAS constructor may not allow us to create as many volume as we need
- Each volume must be created in a future-proof manner
My Time Machine backup solution
Now that we have an overview of the three main solutions I’ve found on the Internet, it is time for me to show the one I’ve chosen. But first, I want to show an overview of my setup.
Overview of my setup
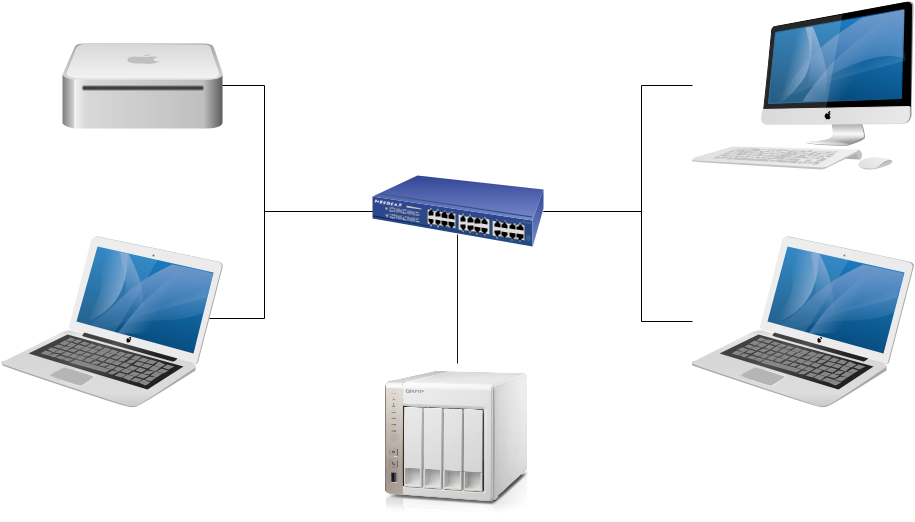
My setup is quite simple:
- A dedicated NAS
- My wife iMac and Macbook Air
- My Mac Mini and Macbook Pro
Before having a NAS, I was using one dedicated drive per machine.
This solution works fine with the Mac Mini and the iMac because they stay on the same place but we lost one USB port…
Regarding the Macbook Air and Pro, backups only occur at home because there is no reason to travel with the dedicated Time Machine backup hard drive.
The problem with that is quite simple, we always forget to connect the drive when we come back home…
My plan is to provide a simple network drive to backup all my macOS machines without the need of an attached drive on every devices.
The good point is that Time Machine is capable of working with both attached drive or network drive without any issue.
My solution
Overview of the NAS storage setup used in my solution:
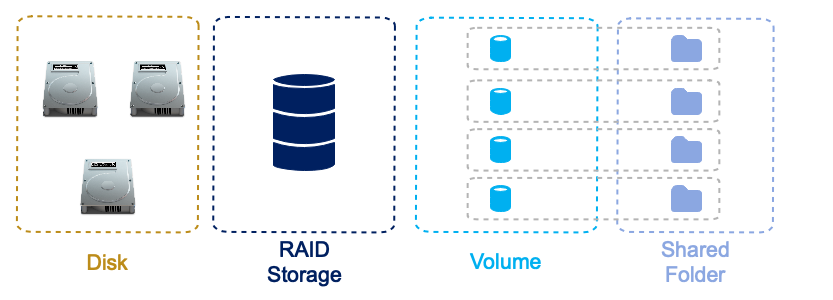 |  |
As you can see, we have:
- A bunch of hard drives configured as a RAID5 Pool
- Four volumes (one per machine)
- Only one shared folder per volume
- Some NAS defined users, in this case two:
- Laurent (me)
- Jasmine (my wife)
My choice is Solution 3. It is a personal choice and it is because I like the fact that I can fine-control each volume and Time Machine can use the whole volume size as it was the case when I was using an external hard drive. I’ve a NAS that is dedicated to my Time Machine backups with just four volumes which is not that much and my NAS can handle them without any issue. At the time of writing, I do not have any problem with this setup that is perfectly working as expected. My wife is happy to get one more accessible USB port and she can totally forget about her iMac or Macbook Air backup’s because they are completely transparent and hidden to her.
Conclusion
In this blog post, we get an overview of three solutions that can be used to backup our Mac using Time Machine. Each solution comes with a few drawbacks and fortunately with good points. We moved on to my own solution and the reason I’ve chosen it over the others. You are free to choose the solution that perfectly feet your needs. We all have our affinity regarding a particular solution and my solution is not the must be used one. So I hope that this post help you decide which solution works better for you and I hope that you enjoyed this post.
Thank you for reading, if you have any questions or remarks, feel free to contact me on twitter or by e-mail.